Converting your BMW E36 from automatic to manual enhances driving engagement and performance. A popular modification, this swap typically involves installing a ZF five-speed gearbox, clutch, and flywheel. The E36’s standard bellhousing bolt pattern ensures compatibility across all engines, simplifying the process. This guide provides a comprehensive walkthrough, helping enthusiasts achieve a seamless transition to manual transmission.
Overview of the E36 Platform
The BMW E36, produced from 1990 to 2000, is a rear-wheel-drive platform known for its balanced chassis and precise handling. Available in sedan, coupe, convertible, and wagon body styles, the E36 offers a wide range of engine options, from inline-4 to inline-6 powerplants. Its lightweight design and responsive steering make it a favorite among enthusiasts. The E36’s modular structure simplifies modifications, including transmission swaps. With a robust aftermarket support and extensive documentation, the E36 remains a popular choice for those seeking to enhance performance and driving experience. Its timeless design and mechanical simplicity continue to attract both new and experienced car modifiers, making it an ideal candidate for an automatic to manual transmission conversion.
Why Consider a Manual Swap?

Converting your BMW E36 from automatic to manual offers enhanced driving engagement and control. Manual transmissions provide a more direct connection to the vehicle, improving acceleration and responsiveness. They also eliminate the complexity and potential failures associated with automatic systems. For enthusiasts, a manual swap restores the car’s intended driving experience, making it more engaging and rewarding. Additionally, manual transmissions are typically more cost-effective in the long run, with lower maintenance and repair costs. The E36’s straightforward design and abundant aftermarket support make the swap feasible for many owners. This modification is particularly appealing for those seeking to optimize performance, reduce reliance on automatic systems, and connect more intimately with their vehicle.
Understanding the Complexity of the Swap
While the E36 auto-to-manual swap is well-documented, it involves several complex steps requiring mechanical aptitude. The process includes removing the automatic transmission, installing a manual gearbox, and adapting the clutch system. Electrical modifications, such as wiring harness adjustments and installing a clutch switch, are also necessary. Additionally, the swap requires precise alignment of components like the gear selector assembly and transmission mounts. Although the E36’s design simplifies the process with a universal bellhousing bolt pattern, careful planning and attention to detail are crucial to avoid issues. Proper tools and a clean workspace are essential, and enthusiasts should prepare for a time-consuming project that demands patience and skill. Despite the challenges, the reward is a more engaging and responsive driving experience tailored to the car’s capabilities.
Parts and Tools Needed for the Swap
The E36 manual swap requires a ZF five-speed gearbox, clutch, flywheel, transmission mounts, crossmember, and wiring harness. Essential tools include a transmission jack, wrenches, and electrical connectors. Ensure all components are compatible with your specific E36 model for a smooth installation process.
Manual Gearbox Options (e.g., ZF Five-Speed)
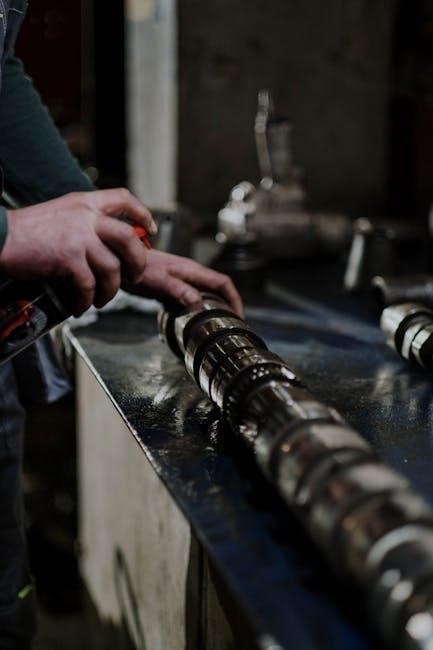
The ZF five-speed manual gearbox is a popular choice for the E36 swap due to its durability and compatibility. This transmission, often sourced from JDM models, bolts directly to the E36’s engine without modification. Its robust design handles increased torque, making it ideal for performance-oriented builds. Ensuring the gearbox is in good condition with proper synchronization and bearings is crucial for smooth operation. Additionally, consider refurbished or used units to save costs while maintaining reliability. Always verify compatibility with your E36’s specific engine and configuration before purchasing or installing the manual gearbox.
Clutch and Flywheel Requirements
The clutch and flywheel are critical components in the manual swap, requiring careful selection to ensure proper operation. A high-quality clutch kit, such as the Sachs or Luk, is essential for smooth engagement and durability. The flywheel must be compatible with the manual gearbox, often requiring a dual-mass flywheel for the ZF five-speed. Proper alignment and installation are vital to prevent noise and wear. Upgrading these components ensures reliability and performance, making them a key part of the swap. Always verify specifications to match your E36’s engine and transmission setup for optimal results.
Transmission Mounts and Crossmember
Proper transmission mounts and a compatible crossmember are essential for a successful manual swap. The E36’s manual transmission typically uses a specific crossmember designed for the ZF five-speed gearbox, differing from the automatic setup. Ensure the mounts and crossmember are compatible with your manual gearbox to maintain proper drivetrain alignment and minimize vibrations. Incorrect or mismatched components can lead to drivetrain noise, instability, or premature wear. Always verify compatibility with your specific E36 model and transmission type for a secure and reliable installation.
Wiring Harness and Electrical Components
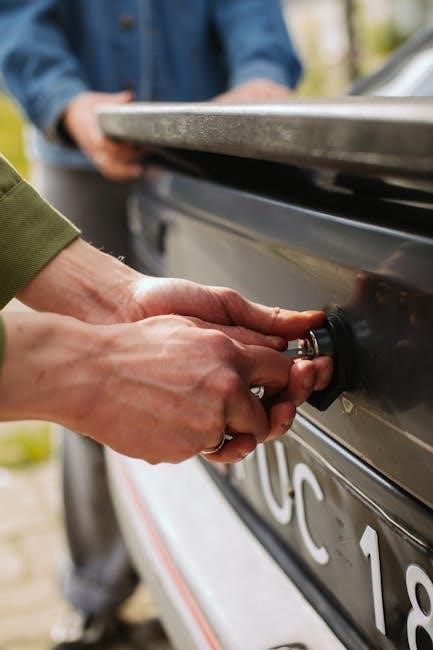
When performing an E36 auto to manual swap, the wiring harness and electrical components require careful modification. The manual transmission eliminates the need for certain automatic-specific sensors, but new components like the reverse light switch and clutch switch must be integrated. Install a reverse light harness to ensure proper functionality, as this feature is typically absent in manual transmissions. The clutch switch is essential for starting the car with the clutch pressed. Ensure all wiring modifications are compatible with your E36’s electrical system. While the E36’s simpler electronics make this swap more straightforward than modern cars, attention to detail is crucial to avoid electrical issues. Properly routing and connecting these components ensures smooth operation and prevents potential failures down the road.

Preparation for the Swap
Drain fluids, disconnect the battery, and inspect the chassis. Remove the automatic transmission and prepare the car for manual components. Ensure all tools and parts are ready beforehand.
Draining Fluids and Disconnecting the Battery
Begin by draining the transmission fluid, coolant, and differential fluid if necessary. Use a drain pan and funnel to collect fluids safely. Wear protective gloves and eyewear. Disconnect the car battery to prevent electrical issues during the swap. Ensure the vehicle is on level ground and apply the parking brake. Drain the transmission fluid by locating the pan underneath the car and removing the drain plug. Be prepared for the fluid to flow quickly, so have a large drain pan ready. Once fluids are drained, inspect the area for any leaks or debris. Store the drained fluids responsibly. Finally, disconnect the negative terminal of the battery to ensure no power is running through the system during the swap. This step is crucial for safety and prevents any accidental starts or electrical shocks. Proper preparation ensures a smooth and incident-free process. Always follow proper safety protocols when working with automotive fluids and electrical systems. Use a torque wrench to remove bolts securely, and label any wires or components for easy reinstallation later. Keep rags handy to clean up spills and wipe down surfaces. This initial step sets the foundation for a successful swap, so take your time and be meticulous. Avoid rushing, as negligence can lead to complications down the line. By carefully draining fluids and disconnecting the battery, you protect both yourself and your vehicle from potential hazards. Proper disposal of used fluids is also essential to maintain environmental responsibility. Always refer to your local regulations for disposing of automotive fluids and materials. This careful approach ensures that the swap proceeds without unnecessary risks or setbacks. Remember, patience and attention to detail are key in any major automotive project. By following these steps, you create a safe and organized workspace, which is vital for the success of your E36 auto-to-manual conversion. Keep all tools and parts within easy reach to maintain efficiency throughout the process.
Removing the Automatic Transmission
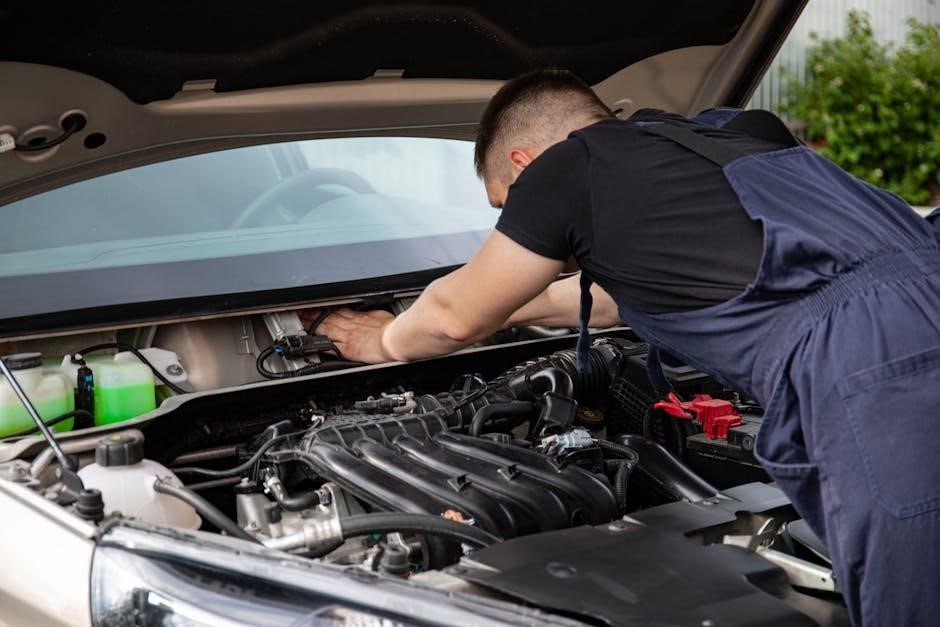
Removing the automatic transmission is a critical step in the swap. Start by disconnecting the driveshaft and securing it to prevent rotation. Next, remove the transmission crossmember and mounts to access the unit. Use a jack or transmission lift to support the transmission, ensuring it is securely held in place. Disconnect any remaining electrical connectors and fluid lines carefully. Once all components are detached, slowly lift the transmission out of the chassis. Be cautious, as the unit is heavy and may still contain residual fluid. Properly draining the transmission beforehand minimizes mess and ensures safety. After removal, inspect the area for any debris or old gasket material, which should be cleaned before installing the manual gearbox. This step requires patience and careful planning to avoid damage to surrounding components. Always use appropriate lifting equipment and follow safety guidelines when handling heavy automotive parts. The successful removal of the automatic transmission paves the way for the manual gearbox installation, marking a major milestone in the swap process. Ensure all bolts and fasteners are stored safely for reassembly later. This step is both physically demanding and technically intricate, making it essential to work methodically and avoid rushing. Proper execution here ensures a smoother transition to the manual setup. Remember to document the process for reference during reinstallation of new components. By carefully removing the automatic transmission, you set the stage for a successful manual swap, enhancing your E36’s performance and driving experience.
Inspecting and Preparing the Chassis
Inspecting and preparing the chassis is crucial before installing the manual transmission. Begin by examining the transmission tunnel and surrounding areas for any damage or wear. Clean the chassis thoroughly, removing old gasket material and debris to ensure a smooth installation. Check for rust or corrosion and address it with a wire brush and sandpaper to prevent further damage. Inspect the transmission mounts and crossmember, replacing any worn or damaged components to maintain structural integrity. Ensure all surfaces are clean and dry to achieve a proper seal with the new transmission. This step is essential for preventing future leaks and ensuring the manual transmission fits securely. Proper preparation now will lead to a smoother installation and better overall performance. Take your time to inspect every detail, as this foundational work will impact the success of the swap. Ensure all necessary tools and materials, like sealants and gaskets, are ready for the next steps. Safety is paramount, so always work with the car securely supported on jack stands. By meticulously inspecting and preparing the chassis, you set the stage for a successful manual transmission installation and enhanced driving experience. This attention to detail will pay off in the long run, ensuring reliability and performance. Remember, a well-prepared chassis is the backbone of a successful swap. Stay organized and methodical to avoid missing any critical steps. The time spent here will ensure a trouble-free transition to your manual setup. With the chassis ready, you can proceed confidently to the installation phase, knowing your car is in optimal condition for the upgrade. This thorough preparation is a key part of the process and should not be overlooked. Stay focused and ensure every aspect of the chassis is ready before moving forward. Your diligence here will be rewarded with a seamless and enjoyable driving experience once the swap is complete. Preparation is the cornerstone of a successful manual transmission swap, and this step ensures your E36 is ready for the upgrade.

Installation Process
The installation process involves fitting the manual gearbox, followed by the clutch and flywheel assembly. Proper alignment and torque specifications ensure reliability and performance. This step requires precision and care to guarantee smooth operation.
Installing the Manual Gearbox
Installing the manual gearbox begins with removing the automatic transmission and gear selector assembly. Once the old components are out, the ZF five-speed manual gearbox is carefully lowered into place. Alignment is critical to ensure proper fitment with the engine’s bellhousing. The gearbox is bolted securely, following torque specifications. Connecting the driveshaft and transmission mounts ensures stability. Proper installation requires patience and attention to detail to avoid mechanical issues. This step is foundational for the entire swap, as improper installation can lead to performance problems. Always refer to detailed guides or forums for specific torque values and alignment tips to ensure a smooth process.
Fitting the Clutch and Flywheel
Fitting the clutch and flywheel is a critical step in the E36 auto-to-manual swap. The flywheel must be inspected and replaced if worn, as it directly impacts clutch performance. A new clutch kit, compatible with the manual gearbox, is installed next. Proper alignment of the clutch and flywheel is essential to ensure smooth operation. The pilot bearing, which guides the input shaft, must also be replaced to prevent vibrations and noise. Tightening the flywheel bolts in a star pattern ensures even pressure. Once installed, the clutch assembly connects to the gearbox, completing the mechanical link between the engine and transmission. This step requires precision to avoid future issues with shifting or engagement.
Connecting the Gear Selector Assembly
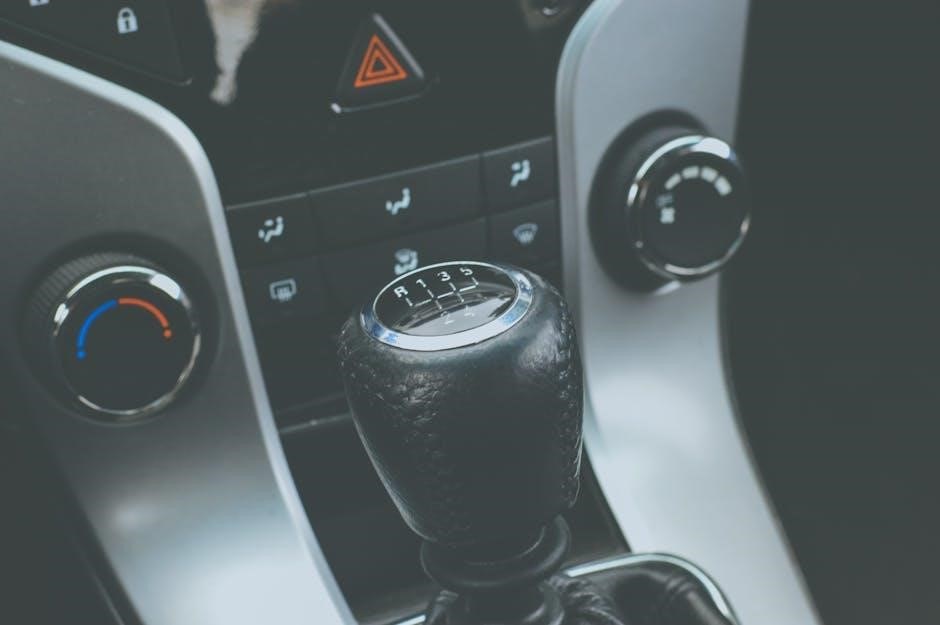
Connecting the gear selector assembly is a crucial step in the E36 manual swap. Begin by removing the automatic gear selector and its associated components. Install the manual gear selector assembly, ensuring it is securely bolted to the transmission tunnel. Align the selector rod with the gearbox, making sure it engages each gear smoothly. The reverse light switch is typically integrated into the manual gearbox and must be connected to the wiring harness. Additionally, the clutch switch, which prevents the car from starting without the clutch pressed, should be installed and connected to the clutch pedal assembly. Proper adjustment of the gear selector ensures precise shifting and prevents misalignment issues. This step requires careful alignment and testing to confirm all gears engage correctly.
Electrical and Wiring Considerations
The E36 auto-to-manual swap involves mechanical and electrical challenges, requiring precise installation of the gearbox, clutch, and wiring modifications, while ensuring compatibility and proper alignment for smooth operation.
Understanding the Wiring Harness
The wiring harness is a critical component in the E36 auto-to-manual swap, requiring careful modification to integrate manual transmission components. Key steps include installing a reverse light switch, clutch switch, and pedal assembly. The harness must be adapted to accommodate these new electrical connections, ensuring proper communication between the gearbox and the car’s systems. While the E36’s wiring is relatively straightforward, precise attention to detail is essential to avoid operational issues. Consulting a wiring diagram or guide is highly recommended to ensure all connections are correct and functional. Proper installation ensures smooth operation of the manual transmission and related systems, making the swap both safe and reliable.
Installing the Reverse Light Switch
Installing the reverse light switch is a straightforward yet crucial step in the E36 auto-to-manual swap. The switch is typically located near the manual gearbox and must be connected to the wiring harness to activate the reverse lights when the car is in reverse gear. Ensure the switch is properly secured and aligned with the gearbox’s reverse gear position. Connect the electrical connector to the harness, making sure it is securely fastened. Adjust the switch as needed to ensure proper activation when shifting into reverse. This step is essential for maintaining proper functionality and safety. Always consult a wiring diagram or guide for precise instructions tailored to your E36 model. Accurate installation prevents electrical issues and ensures the reverse lights operate correctly during the swap.
Clutch Switch andPedal Assembly
Clutch Switch and Pedal Assembly
Installing the clutch pedal assembly and switch is a critical step in the manual swap. The clutch switch is typically mounted on the clutch pedal assembly and must be properly adjusted to ensure correct operation. Connect the clutch switch wiring to the harness, ensuring secure electrical connections. The switch activates the clutch engagement signal, which is essential for starting the car in gear. Adjust the pedal assembly to achieve the correct pedal height and travel, ensuring smooth operation. Proper installation of the clutch switch and pedal assembly ensures reliable functionality and prevents issues with starting or shifting gears. Always refer to a wiring diagram or guide for your specific E36 model to ensure accurate installation. This step is vital for a seamless manual transmission experience.
Post-Swap Considerations
After the swap, bleed the clutch system, refill transmission and differential fluids, and test the manual transmission to ensure proper installation and safety.
Bleeding the Clutch System
Bleeding the clutch system is essential to remove air bubbles, ensuring proper clutch engagement. Use a pressure bleeder or manual bleeding kit to purge the hydraulic system. Start by pumping the clutch pedal several times to pressurize the system, then open the bleeder valve to release air and fluid. Repeat until fluid flows without bubbles. Inspect the clutch master and slave cylinders for leaks. Refill the reservoir with the recommended brake fluid. Test the pedal feel and clutch engagement to confirm the system is functioning correctly. Proper bleeding ensures smooth and precise gear shifts, avoiding potential damage to the transmission or clutch components.
Refilling Transmission and Differential Fluids
After completing the manual swap, refilling the transmission and differential fluids is crucial for optimal performance. Use synthetic gear oil for the manual gearbox, adhering to BMW specifications for viscosity and type. For the differential, select a high-quality gear lubricant suitable for your E36’s axle. Drain the old fluid carefully before refilling to prevent contamination. Use a fluid transfer pump or pour directly from the bottle, ensuring the fluid level matches the manufacturer’s recommendations. Double-check for any leaks around the seals and connections. Proper lubrication ensures smooth gear engagement and protects internal components from wear. Test drive the car to confirm smooth operation and address any issues promptly.
Testing the Manual Transmission
Testing the manual transmission ensures proper function after the swap. Start with a slow, controlled drive to assess gear engagement and clutch operation. Check for smooth shifting through all gears, including reverse. Verify that the car starts in neutral and that there’s no unintended movement in gear. Pay attention to any unusual noises or vibrations, which could indicate issues with the clutch or gearbox. Accelerate gradually to test for slipping or hesitation. Ensure the clutch pedal operates smoothly, with a clear “biting point” when engaging gears. If equipped, test the reverse light functionality. A short test drive in a quiet area allows you to confirm the system’s reliability and performance.

Troubleshooting Common Issues
Common issues during the swap include fluid leaks, faulty wiring, or improper clutch alignment. Noisy gears or hard shifting may indicate misaligned components or damaged parts. Addressing these promptly ensures reliability.
Common Problems During the Swap
During an E36 auto to manual swap, common issues arise, such as fluid leaks from the transmission or clutch system. Improper alignment of the clutch and flywheel can cause difficulty in shifting gears. Additionally, wiring harness mistakes may lead to electrical failures, particularly with the reverse light and clutch switches. Mechanical problems, such as a damaged gear selector assembly or worn-out transmission mounts, can also occur. It’s crucial to address these issues early to avoid further complications and ensure a smooth transition to manual transmission. Proper tools and guides are essential to mitigate these challenges effectively.
Diagnosing Electrical Issues
Electrical issues during an E36 auto to manual swap often stem from wiring harness errors or faulty connections. Symptoms include malfunctioning reverse lights, erratic clutch engagement, or complete loss of electrical signals. To diagnose, use a multimeter to test continuity and voltage in the wiring harness. Check the reverse light switch and clutch switch for proper installation and functionality. Consult the wiring diagram specific to your E36 model to ensure all connections are correct. Faulty or damaged ECU pins can also cause issues, requiring careful inspection. Addressing these problems early prevents further complications and ensures smooth operation of the manual transmission system. Proper tools and knowledge are essential for accurate diagnosis and resolution.
Addressing Mechanical Failures
Mechanical failures during an E36 auto to manual swap can arise from improper installation or component incompatibility. Common issues include misaligned transmission mounts, faulty clutch engagement, or damaged synchros. To address these, inspect the bellhousing for proper alignment with the engine. Ensure the crossmember is securely bolted and the transmission is correctly seated. If the clutch fails to engage, check the clutch cable or hydraulic system for leaks or misadjustment. For gear engagement problems, verify the gear selector assembly is properly installed. Always use a torque wrench to ensure correct bolt specs. Preventative measures, such as pre-inspecting used parts and following step-by-step guides, can minimize mechanical failures. A thorough post-installation test drive is crucial to identify and resolve any lingering issues before they escalate.

Final Inspection and Safety Checks
Conduct a thorough inspection of all installed components, ensuring proper functionality and safety. Verify the transmission, clutch, and wiring are secure and functioning correctly. Check fluid levels and ensure no leaks. Test all safety features before the initial test drive to guarantee a safe and successful swap completion.
Ensuring Proper Installation
Proper installation is critical for the success of your E36 auto-to-manual swap. Begin by verifying that all components are securely fitted and aligned correctly. The transmission, clutch, and flywheel must be properly mounted to avoid mechanical failure. Ensure all wiring connections are secure and correctly routed to prevent electrical issues. Tighten all bolts and fasteners to the specified torque values to maintain structural integrity. Double-check the gear selector assembly and reverse light switch to confirm they are functioning as intended. Finally, inspect the transmission mounts and crossmember for any signs of damage or misalignment. This meticulous approach ensures a smooth and reliable operation of your newly installed manual transmission.
Verifying Safety Precautions
Before finalizing your E36 auto-to-manual swap, it’s essential to verify all safety precautions. Ensure the wiring harness is securely connected, and the reverse light switch functions correctly. Check the clutch switch and pedal assembly for proper operation, as these are critical for safe driving. Inspect all hydraulic lines and connections for leaks or damage. Confirm that the battery is disconnected during testing to avoid electrical hazards. Additionally, ensure no fluids (transmission or differential) are leaking after refilling. Double-check the transmission mounts and crossmember for stability. If uncertain, consult a qualified mechanic to verify the setup. These precautions ensure your vehicle operates safely and reliably, minimizing the risk of mechanical or electrical failure during the test drive.
Preparing for a Test Drive
Before taking your E36 for a test drive after the manual swap, ensure all systems are functioning correctly. Start by checking the clutch pedal for proper engagement and disengagement. Verify that the reverse light switch and clutch switch are working as intended. Test the gear selector assembly to ensure smooth shifting through all gears. Check the transmission and differential fluids for proper levels and condition. Inspect the wiring harness for any loose connections or damage. Finally, find a safe, open area to test the vehicle, starting with slow, controlled movements to familiarize yourself with the manual transmission. This step is crucial to ensure a smooth and safe driving experience after the swap.
The E36 auto-to-manual swap is a rewarding project that enhances performance and driving enjoyment. For detailed guidance, refer to specialized forums, repair manuals, and community resources.
The E36 auto-to-manual swap involves replacing the automatic transmission with a manual gearbox, such as the ZF five-speed, and installing a clutch and flywheel. Key steps include draining fluids, disconnecting the battery, and removing the automatic transmission. The chassis must be inspected and prepared to accommodate the manual components. Installing the gearbox, clutch, and flywheel requires precision, followed by connecting the gear selector assembly. Electrical adjustments, like wiring harness modifications and installing switches, are crucial for proper functionality. Post-swap tasks include bleeding the clutch system and refilling fluids. Testing the manual transmission ensures everything operates smoothly. Detailed guides, specialized tools, and community forums provide invaluable support for a successful swap.
Recommended Tools and Guides
Successfully completing an E36 auto-to-manual swap requires the right tools and resources. Essential tools include a transmission jack, socket set, wrenches, and a clutch alignment tool. A detailed step-by-step guide or manual is crucial for navigating the process. Many enthusiasts recommend online forums like Bimmerforums or specialized BMW communities, where members share their experiences and provide tips. Video tutorials and DIY guides on platforms like YouTube can offer visual guidance, especially for complex steps like wiring and clutch installation. Additionally, consulting a BMW repair manual or a dedicated E36 swap guide ensures accuracy and helps troubleshoot common issues. Having these resources readily available will streamline the process and minimize potential pitfalls.
Community Support and Forums
The BMW E36 community is a valuable resource for anyone undertaking an auto-to-manual swap. Forums like Bimmerforums and the E36 subreddit are filled with detailed threads, personal experiences, and troubleshooting tips. Many enthusiasts have documented their swaps, sharing step-by-step processes and photos. These communities can help resolve common issues and provide reassurance when encountering challenges. Additionally, specialized Facebook groups and local BMW meetups often connect members with experienced individuals who can offer hands-on advice. Engaging with these communities ensures access to a wealth of knowledge, reducing the learning curve and helping you avoid costly mistakes. Their collective expertise is invaluable for a successful and stress-free swap.