Pioneer Mini Split Remote Control Instructions: A Comprehensive Guide (Updated 03/09/2026)
Today’s date is 03/09/2026 22:26:07. This guide details Pioneer mini-split remote operation‚ including Diamante series (WYT) with WiFi module integration via the Tuya Smart App.
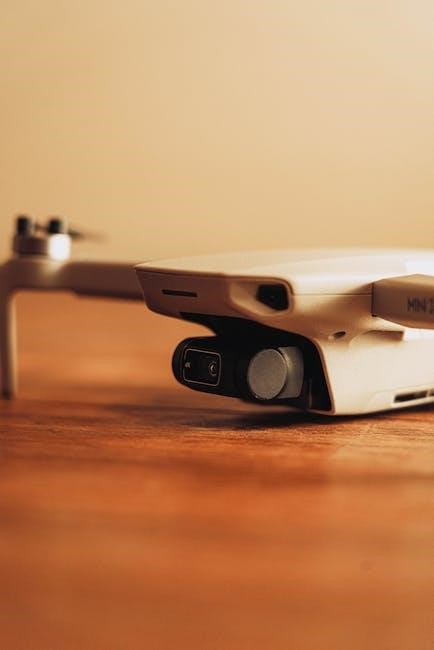
Understanding Your Pioneer Mini Split System
Pioneer mini-split systems offer efficient and zoned climate control‚ differing significantly from traditional central air systems. These systems comprise an indoor unit‚ an outdoor compressor‚ and a vital component – the remote control. Understanding how these elements interact is crucial for optimal performance and comfort.
Unlike central air‚ mini-splits don’t rely on ductwork‚ reducing energy loss and allowing for individual temperature adjustments in different rooms. The remote control serves as your primary interface‚ enabling you to manage settings like temperature‚ fan speed‚ and operating mode (cool‚ heat‚ auto‚ dry).
Specifically‚ the Diamante series (WYT) benefits from optional WiFi integration using the TST-DIAWIFITPD module‚ extending control to your smartphone via the Tuya Smart App. However‚ note that WYS series models utilize a different system‚ incompatible with this WiFi module. Familiarizing yourself with your specific series is key to unlocking all available features and ensuring seamless operation. Proper understanding allows for maximized efficiency and personalized comfort.
Remote Control Overview & Key Functions
Your Pioneer mini-split remote is designed for intuitive control of your system. Key functions include the power button for on/off operation‚ temperature up/down controls‚ and a mode selection button cycling through Cool‚ Heat‚ Auto‚ and Dry settings. Fan speed adjustment is typically managed with a dedicated button‚ offering options like Auto‚ Low‚ Medium‚ and High.
For models with WiFi capability (Diamante series with TST-DIAWIFITPD)‚ a WiFi button initiates pairing with your home network. The timer buttons are essential for scheduling operation‚ while the sleep mode button adjusts temperature gradually for comfortable nighttime use. The display shows the current settings‚ including temperature‚ mode‚ and fan speed.
Understanding the infrared (IR) signals emitted by the remote is possible for advanced users using tools like Pronto Hex and Python scripts‚ allowing for signal parsing and analysis. However‚ standard operation relies on the clearly labeled buttons for everyday adjustments and convenience.
Initial Setup & Pairing the Remote
Upon receiving your Pioneer mini-split system‚ the remote should ideally be pre-paired. However‚ if it isn’t‚ or if pairing is lost‚ a simple process restores connectivity. Ensure the indoor unit is powered on. Point the remote directly at the indoor unit’s receiver and press and hold the designated pairing button (often the WiFi button on Diamante series remotes with the TST-DIAWIFITPD module) for several seconds.
The indoor unit will typically emit a beep or display a confirmation message indicating successful pairing. For WiFi models‚ this also initiates the connection process to the Tuya Smart App. If pairing fails‚ repeat the process‚ ensuring no obstructions are between the remote and the indoor unit.
Refer to the specific model’s manual for precise button locations and pairing instructions‚ as slight variations may exist. Successful pairing is crucial for utilizing all remote functions‚ including WiFi control via your smartphone.
Battery Installation & Replacement
Your Pioneer mini-split remote control typically requires two AAA or AA batteries (check your specific model’s documentation for the correct size). To install‚ gently slide off the battery cover located on the back of the remote. Insert the batteries‚ ensuring correct polarity – match the positive (+) and negative (-) ends as indicated within the battery compartment.
Replace batteries when the remote’s display becomes dim or unresponsive‚ or when the operating range decreases significantly. Always use new batteries of the same type and avoid mixing old and new batteries. Dispose of used batteries responsibly‚ following local regulations for battery recycling.
Low battery levels can sometimes cause erratic remote behavior. If experiencing issues‚ replacing the batteries is a simple first troubleshooting step. A properly functioning remote with fresh batteries ensures reliable control of your Pioneer mini-split system.
Basic Operation: On/Off & Mode Selection
To power on your Pioneer mini-split‚ press the “On/Off” button on the remote control. The unit will initiate its startup sequence‚ and you’ll see confirmation on both the remote display and the indoor unit. Pressing the same button again will turn the system off. Ensure the unit is plugged in and receiving power for this to function correctly.
The “Mode” button allows you to cycle through the available operating modes: Auto‚ Cool‚ Dry‚ Heat‚ and Fan Only. Each mode optimizes the system for different comfort needs. “Auto” automatically selects cooling or heating based on the room temperature. “Cool” provides cooling‚ “Dry” dehumidifies‚ “Heat” provides warmth‚ and “Fan Only” circulates air without temperature adjustment.
The currently selected mode will be displayed on the remote’s screen. Familiarize yourself with these modes to efficiently control your indoor climate.
Temperature Adjustment & Fan Speed Control
Adjusting the temperature is straightforward using the “Temp Up” and “Temp Down” buttons on your Pioneer remote; Each press typically adjusts the setpoint by one degree Fahrenheit or Celsius‚ depending on your unit’s setting. The desired temperature will be clearly displayed on the remote’s screen.
Fan speed control offers multiple levels for customized airflow. Use the “Fan Speed” button to cycle through options like Auto‚ Low‚ Medium‚ High‚ and sometimes a dedicated “Quiet” mode. “Auto” adjusts fan speed based on the cooling or heating demand. Lower speeds conserve energy and reduce noise‚ while higher speeds provide faster temperature adjustments.
Experiment with different fan speed settings to find the optimal balance between comfort and energy efficiency. Remember that the available fan speeds may vary slightly depending on your specific Pioneer mini-split model.
Advanced Features: Timer & Sleep Mode
Pioneer mini-split remotes offer convenient advanced features like timer and sleep mode‚ enhancing comfort and energy savings. The timer function allows you to schedule the unit to automatically turn on or off at specific times‚ optimizing operation based on your daily routine. This is particularly useful for pre-cooling or pre-heating a room before you arrive.
Sleep mode gradually adjusts the temperature overnight‚ preventing extreme temperature fluctuations while you sleep. This mode typically increases the setpoint by a few degrees in cooling or decreases it in heating‚ promoting a more comfortable and energy-efficient sleep environment.
Accessing these features usually involves dedicated buttons on the remote‚ followed by setting the desired parameters using the numeric keypad and confirmation buttons. Explore these options to personalize your cooling or heating experience.
Using the Timer Function for Scheduled Operation
To utilize the timer function on your Pioneer mini-split remote‚ first press the “Timer” button. This will typically activate the timer setting mode‚ indicated by an icon on the remote’s display. Next‚ use the numeric keypad to input the desired start time for the scheduled operation. Ensure the time is entered in the correct format (e.g.‚ HH:MM – hours and minutes).
Following time entry‚ you may need to select whether you want the unit to turn “On” or “Off” at the set time. Some remotes offer multiple timer settings‚ allowing for both on and off schedules. Confirm your selections by pressing the “Set” or “Confirm” button.
The remote will display an indicator confirming the timer is active. Remember to verify the clock on your mini-split is accurately set for the timer to function correctly.
Leveraging Sleep Mode for Comfortable Nights
Pioneer mini-split’s Sleep Mode is designed to optimize comfort and energy efficiency during sleep. Activate it by pressing the dedicated “Sleep” button on your remote control. This function gradually adjusts the temperature throughout the night‚ preventing drastic temperature swings while you rest.
Typically‚ Sleep Mode will initially lower the cooling setpoint by 1-2 degrees Celsius (or equivalent in Fahrenheit) per hour for the first few hours. After reaching a pre-defined minimum temperature‚ it maintains that level until the timer ends‚ or the unit is manually turned off.
Some models allow customization of the Sleep Mode settings‚ such as the rate of temperature adjustment or the duration of the mode. Check your specific model’s manual for details. Utilizing Sleep Mode can contribute to a more restful and energy-conscious sleep environment.
Troubleshooting Common Remote Issues
Encountering issues with your Pioneer mini-split remote? Several common problems can arise. First‚ ensure the remote has fresh batteries installed correctly‚ checking for corrosion. If the remote isn’t responding‚ try resetting the unit by briefly disconnecting its power source. Obstructions between the remote and the indoor unit’s IR sensor can also cause problems – remove any objects blocking the signal path.
For display issues‚ a weak battery is often the culprit. If the display remains blank even with new batteries‚ the remote itself may be faulty. If the remote sends incorrect signals‚ it might require re-pairing with the indoor unit (refer to the ‘Initial Setup & Pairing’ section).
Advanced users can explore decoding infrared signals using tools like Pronto Hex and Python for deeper analysis‚ but this is generally not needed for basic troubleshooting.
Remote Not Responding: Possible Causes & Solutions
Is your Pioneer remote failing to communicate with the unit? The most frequent cause is depleted or incorrectly installed batteries. Replace them with fresh ones‚ ensuring proper polarity. Next‚ verify a clear line of sight between the remote and the indoor unit’s infrared (IR) sensor; obstructions like furniture or direct sunlight can interfere.
If the issue persists‚ attempt a power cycle of the mini-split system – briefly disconnect and reconnect the power. A faulty remote sensor within the indoor unit is less common‚ but possible. For Diamante series (WYT) models with the TST-DIAWIFITPD WiFi module‚ confirm the unit isn’t exclusively controlled via the Tuya Smart App.
Advanced users might consider IR signal analysis using Python tools‚ but standard troubleshooting usually resolves the problem. If none of these steps work‚ contact Pioneer support for further assistance.
Display Problems & How to Address Them
Experiencing a blank or distorted display on your Pioneer remote? Begin with the simplest solution: replace the batteries. Low battery power often causes dim or erratic display behavior. If a fresh set of batteries doesn’t resolve the issue‚ inspect the remote’s screen for physical damage – cracks or liquid exposure can render it unusable.
For remote controls used with Diamante series (WYT) mini-splits featuring the TST-DIAWIFITPD WiFi module‚ ensure the remote isn’t attempting to mirror settings from the Tuya Smart App‚ which could cause display conflicts. Try resetting the remote to its factory defaults; consult the user manual for specific instructions‚ as the process varies by model.
If the display remains problematic‚ the remote itself may be defective and require replacement. Contact Pioneer support or an authorized dealer for assistance.
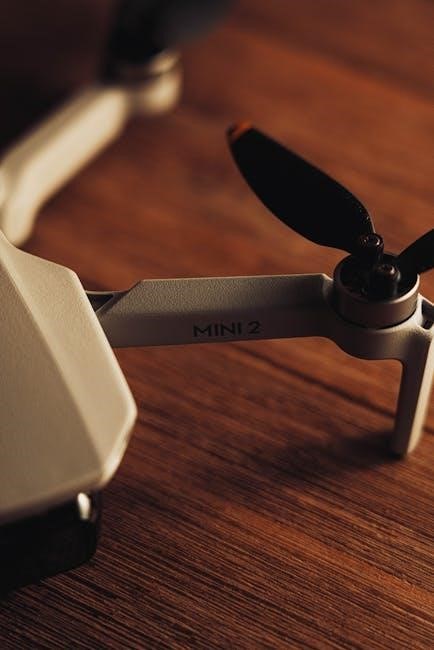
Specific Pioneer Mini Split Series Compatibility
Pioneer offers various mini-split series‚ each potentially utilizing a unique remote control. Understanding compatibility is crucial for optimal functionality. The Diamante series (WYT) is specifically designed to work with remotes supporting the TST-DIAWIFITPD WiFi module‚ enabling integration with the Tuya Smart App for smartphone control.
However‚ it’s vital to note that these remotes are not compatible with the WYS series. WYS models utilize a different protocol – Midea – and require a corresponding Midea-compatible remote for proper operation. Attempting to use a Diamante remote with a WYS unit will result in a lack of communication.
Always verify the remote control model number against your specific Pioneer mini-split series before attempting pairing or operation. Refer to your unit’s documentation or Pioneer’s support website for a comprehensive compatibility chart.
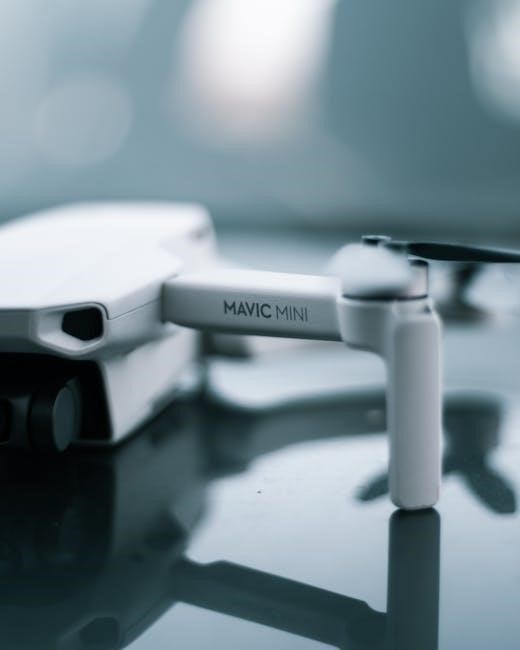
Diamante Series (WYT) Remote Instructions
The Diamante series (WYT) remotes offer advanced control over your Pioneer mini-split system. These remotes are specifically designed for units equipped with the TST-DIAWIFITPD WiFi module‚ allowing seamless integration with smart home ecosystems via the Tuya Smart App. Initial setup involves pairing the remote with your unit‚ ensuring proper infrared signal transmission.
Key functions include power on/off‚ mode selection (cool‚ heat‚ auto‚ dry‚ fan)‚ temperature adjustment‚ and fan speed control. The remote also features timer and sleep mode functionalities for scheduled operation and enhanced comfort. Utilizing the timer function allows pre-setting operation times‚ while sleep mode gradually adjusts temperature during the night.
Important Note: These remotes utilize a Tuya 3.3/3.4 protocol over TCP/6668. Ensure compatibility when connecting to the WiFi module and the Tuya Smart App.

WYS Series Remote Control Guide
Pioneer’s WYS series remotes control mini-split systems‚ offering essential functions for climate management. However‚ it’s crucial to note a significant distinction: these remotes are not compatible with the TST-DIAWIFITPD WiFi module. Unlike the Diamante (WYT) series‚ the WYS series does not support Tuya Smart App integration‚ limiting smart home connectivity.
Basic operations include powering the unit on/off‚ selecting operating modes (cool‚ heat‚ auto‚ dry‚ fan)‚ adjusting the desired temperature‚ and controlling fan speed. While lacking advanced WiFi features‚ the WYS remote provides reliable control over core functionalities. Users can still utilize basic timer settings directly through the remote interface‚ though scheduling options are less flexible than app-based control.
Important Consideration: The WYS series utilizes a different communication protocol than the Diamante series‚ specifically a Midea protocol. Attempting to connect a WYS remote to the TST-DIAWIFITPD module will be unsuccessful.
WiFi Module Integration (TST-DIAWIFITPD)
The TST-DIAWIFITPD WiFi module unlocks smart control for compatible Pioneer mini-split systems‚ specifically the Diamante (WYT) series. This module utilizes a Tuya Tywe1s (ESP8266) chip and communicates via the Tuya 3.3/3.4 protocol over TCP port 6668‚ enabling seamless integration with the Tuya Smart App.
Installation typically involves connecting the module to the mini-split’s control board. Once connected‚ the module allows remote operation‚ scheduling‚ and monitoring of your Pioneer system directly from your smartphone or tablet. This includes adjusting temperature‚ changing modes‚ and setting timers‚ all without needing the physical remote.
Crucially‚ this module is not compatible with Pioneer’s WYS series mini-splits. The WYS series employs a different protocol (Midea) and cannot be integrated with the Tuya ecosystem through this module. Ensure compatibility before purchasing and attempting installation.
Connecting to the Tuya Smart App
To connect your Pioneer Diamante (WYT) mini-split‚ equipped with the TST-DIAWIFITPD module‚ to the Tuya Smart App‚ begin by downloading and installing the app from your device’s app store. Create an account or log in if you already have one.
Next‚ enter pairing mode on the WiFi module – consult the module’s separate instructions for the specific procedure‚ as it often involves pressing and holding a button on the device. Within the Tuya Smart App‚ tap the “+” icon to add a device and select “Auto” or “Manual” addition. The app will search for nearby devices.
Once the module is detected‚ follow the on-screen prompts to connect it to your home’s 2.4 GHz WiFi network. Ensure your smartphone is connected to the same WiFi network. After successful connection‚ your Pioneer mini-split will appear in the Tuya Smart App‚ ready for remote control.
Remote Control via Smartphone: A Step-by-Step Guide
After successfully connecting your Pioneer Diamante mini-split to the Tuya Smart App‚ you can control it remotely via your smartphone. Open the Tuya Smart App and select your added Pioneer device. The app interface will mirror many of the functions of the physical remote control.
You’ll find controls for power‚ mode (Cool‚ Heat‚ Auto‚ Dry‚ Fan)‚ temperature adjustment‚ and fan speed. Tap the desired settings to adjust them. To schedule operation‚ utilize the ‘Timer’ function within the app‚ setting specific on/off times. Explore the app’s features to discover advanced options like sleep mode and scene creation.
Ensure a stable internet connection for reliable control. The app allows control from anywhere with an internet connection‚ offering convenience and energy savings. Regularly check for app updates to benefit from new features and improvements. Remember this functionality is specifically for WYT series models.
Decoding Infrared Signals (Pronto Hex & Python Tools)
For advanced users seeking deeper control and customization‚ decoding the infrared (IR) signals emitted by the Pioneer remote is possible. This involves utilizing tools like Pronto Hex and Python scripting to analyze and replicate remote commands.
Pronto Hex provides a standardized format for representing IR signals‚ allowing you to capture and share remote codes. Python tools can then parse these hex codes‚ converting timings into binary and hexadecimal representations. This enables you to understand the precise signals controlling your mini-split.
This process is particularly useful for creating custom remote control solutions or integrating the mini-split with home automation systems. Understanding IR signal parsing requires technical expertise‚ but opens possibilities for advanced control and automation. Remember that this is a complex process best suited for experienced users.
Understanding IR Signal Parsing for Advanced Users
IR signal parsing delves into the intricacies of how your Pioneer remote communicates with the mini-split unit. It’s about dissecting the timing and patterns of infrared light pulses that represent each button press. This isn’t simply on/off; it’s a complex language of durations and frequencies.
Advanced users can leverage this knowledge to reverse-engineer remote commands‚ identify specific codes for functions like temperature adjustment or fan speed‚ and even create their own custom control schemes. The process involves capturing the raw IR signal using specialized hardware and then analyzing it with software.
Successful parsing requires a solid understanding of digital signal processing and programming concepts. Tools like Python‚ combined with libraries for IR signal analysis‚ are essential. This allows for visualization‚ manipulation‚ and ultimately‚ replication of remote functionality‚ opening doors to sophisticated home automation possibilities.
Utilizing Python Tools for Remote Analysis
Python offers a powerful ecosystem for analyzing Pioneer mini-split remote signals‚ particularly those captured in Pronto Hex format. Several libraries simplify the process of parsing these complex data streams‚ transforming raw timings into manageable code.
Key functionalities include visualizing IR waveforms to identify patterns‚ calculating mean timings to filter out noise‚ and converting pulse durations into binary and hexadecimal representations. This allows users to decipher the specific codes associated with each remote button.
Popular Python tools facilitate this analysis‚ enabling advanced users to create custom scripts for remote control or integration with home automation systems. These scripts can then be used to send commands directly to the mini-split unit‚ bypassing the need for the physical remote altogether. This opens possibilities for automated climate control and remote access.
Maintenance & Care of Your Remote Control
Proper maintenance ensures the longevity and reliable operation of your Pioneer mini-split remote. Regular cleaning is crucial; use a soft‚ dry cloth to wipe the surface‚ removing dust and fingerprints. Avoid abrasive cleaners or solvents‚ as these can damage the buttons and display.

Pay particular attention to the battery compartment‚ ensuring it’s free from corrosion. If corrosion is present‚ carefully clean it with a cotton swab dipped in rubbing alcohol. Always remove the batteries if the remote will be stored for an extended period to prevent leakage.
Protecting the remote from physical damage is also vital. Avoid dropping it or exposing it to extreme temperatures or humidity. Consider using a protective case or storing it in a safe location when not in use. Gentle handling will preserve functionality for years.
Cleaning Instructions & Best Practices
Maintaining a clean remote control is essential for optimal performance and hygiene. Begin by removing the batteries to prevent accidental operation during cleaning. Use a soft‚ lint-free cloth slightly dampened with distilled water – avoid excessive moisture‚ which could damage internal components.
Gently wipe the entire surface of the remote‚ paying attention to areas around the buttons and display. For stubborn dirt or grime‚ a very mild soap solution can be used‚ but ensure it’s thoroughly rinsed off with a clean‚ damp cloth afterward. Never use abrasive cleaners‚ solvents‚ or alcohol-based products.

After cleaning‚ allow the remote to air dry completely before reinserting the batteries. Regularly cleaning your Pioneer remote not only improves its appearance but also prevents the buildup of bacteria and ensures reliable button responsiveness; This simple practice extends the remote’s lifespan.
Protecting Your Remote from Damage
Safeguarding your Pioneer mini-split remote control from physical damage is crucial for continued functionality. Avoid dropping the remote‚ as internal components are sensitive to impact. Store it in a secure location‚ away from direct sunlight‚ extreme temperatures‚ and humidity‚ which can degrade plastic and electronic parts;

Keep the remote away from liquids; even a small spill can cause irreversible damage. Consider using a protective case or cover to shield it from scratches and dust. When not in use‚ store the remote in a drawer or on a stable surface where it won’t be accidentally stepped on or knocked over.
Regularly inspect the battery compartment for corrosion. Promptly replace corroded batteries to prevent damage to the terminals. Gentle handling and preventative measures will significantly extend the life of your Pioneer remote control‚ saving you replacement costs and ensuring uninterrupted operation of your mini-split system.
Finding Replacement Remotes & Support
Locating a replacement Pioneer mini-split remote control is possible through several avenues. Online retailers like Amazon‚ eBay‚ and specialized HVAC parts suppliers often stock compatible remotes. When purchasing‚ verify the model number to ensure compatibility with your specific Pioneer unit – Diamante (WYT) or WYS series require different remotes.
Directly contacting Pioneer support is another reliable option. Their official website provides contact information for customer service‚ where you can inquire about purchasing a replacement or receive guidance on finding an authorized dealer. Be prepared to provide your mini-split’s model number for accurate assistance.
For technical support or troubleshooting beyond remote replacement‚ Pioneer’s support team can offer valuable assistance. Additionally‚ online forums and communities dedicated to HVAC systems may provide helpful tips and solutions from other Pioneer mini-split users. Remember to prioritize official sources for accurate information.
Where to Purchase Replacement Pioneer Remotes
Several online marketplaces offer replacement Pioneer mini-split remotes. Amazon is a readily accessible source‚ often featuring a variety of compatible options. eBay can also yield results‚ potentially offering both new and used remotes at competitive prices. Specialized HVAC parts retailers‚ such as those focusing on mini-split systems‚ are another excellent resource.
For guaranteed compatibility‚ consider contacting authorized Pioneer dealers directly. These dealers can provide genuine Pioneer replacement remotes specifically designed for your model – crucial for Diamante (WYT) or WYS series units. Pioneer’s official website typically lists authorized dealers in your region.

When searching‚ always verify the remote’s model number against your mini-split’s documentation to ensure a proper fit and full functionality. Be cautious of universal remotes‚ as they may not support all Pioneer features. Prioritize retailers with clear return policies in case of incompatibility.
Contacting Pioneer Support for Assistance
If you encounter persistent issues with your Pioneer mini-split remote‚ reaching out to Pioneer’s support team is recommended. Their official website is the primary point of contact‚ typically offering a comprehensive FAQ section addressing common remote control problems and compatibility questions for Diamante (WYT) and WYS series.
Pioneer usually provides multiple support channels‚ including a dedicated phone line for direct assistance. An online contact form allows you to submit detailed inquiries‚ potentially including specifics about your remote model and the issue you’re experiencing. Live chat support may also be available during business hours.
When contacting support‚ have your mini-split’s model number and remote control’s model number readily available. This information expedites the troubleshooting process. Be prepared to describe the problem clearly and concisely‚ detailing any steps you’ve already taken to resolve it. Mentioning WiFi module (TST-DIAWIFITPD) integration if applicable is also helpful.